How To Connect Your Domain To Your Shopify Store
When it comes to domain registrars, two of the most popular are GoDaddy and Namecheap. If you have a GoDaddy domain and add it to Shopify, it's as simple as adding in your domain name and they will automatically go and connect it for you. GoDaddy is the easiest to set up.
Today we're going to learn:
How To Connect Your Domain To Your Shopify Store
Between the two, we recommend Namecheap because, in our experience, it is more reliable, has better tools, and fantastic support.
However, if you found this video, we’re guessing you've likely chosen an alternative registrar than GoDaddy to set up a domain. We’ll walk you through the configuration process and have you up and running in no time.
You’ll begin by searching for the domain you’d like and following through the checkout process.
When that’s completed, we’ll need to set up basic DNS. A domain name server (DNS) is essentially the phone book of the internet. It will look up your website by name, and tell your internet browser which IP address to visit to get there. It uses two features called A-Record and C-Name.
When your computer looks up that record it will redirect your browser to the correct server where the files sit. We need to make that connection between the domain name that we just purchased and our Shopify store. I've got my domain registrar set to basic DNS, I then go add DNS records to my domain name so that it points to the correct place - my Shopify store.

Note: When you're making modifications to DNS, there's something called propagation. Propagation allows the servers to update on a set time interval so the servers aren't getting blasted with constant updates and information. DNS servers use is a technology called TTL which stands for Time to Live. If you have a record with a TTL of 60 minutes, the server will check for updates every 60 minutes. If you're making modifications to an A record or a C name, and you want to make the update happen faster, reduce the TTL to a smaller time interval.


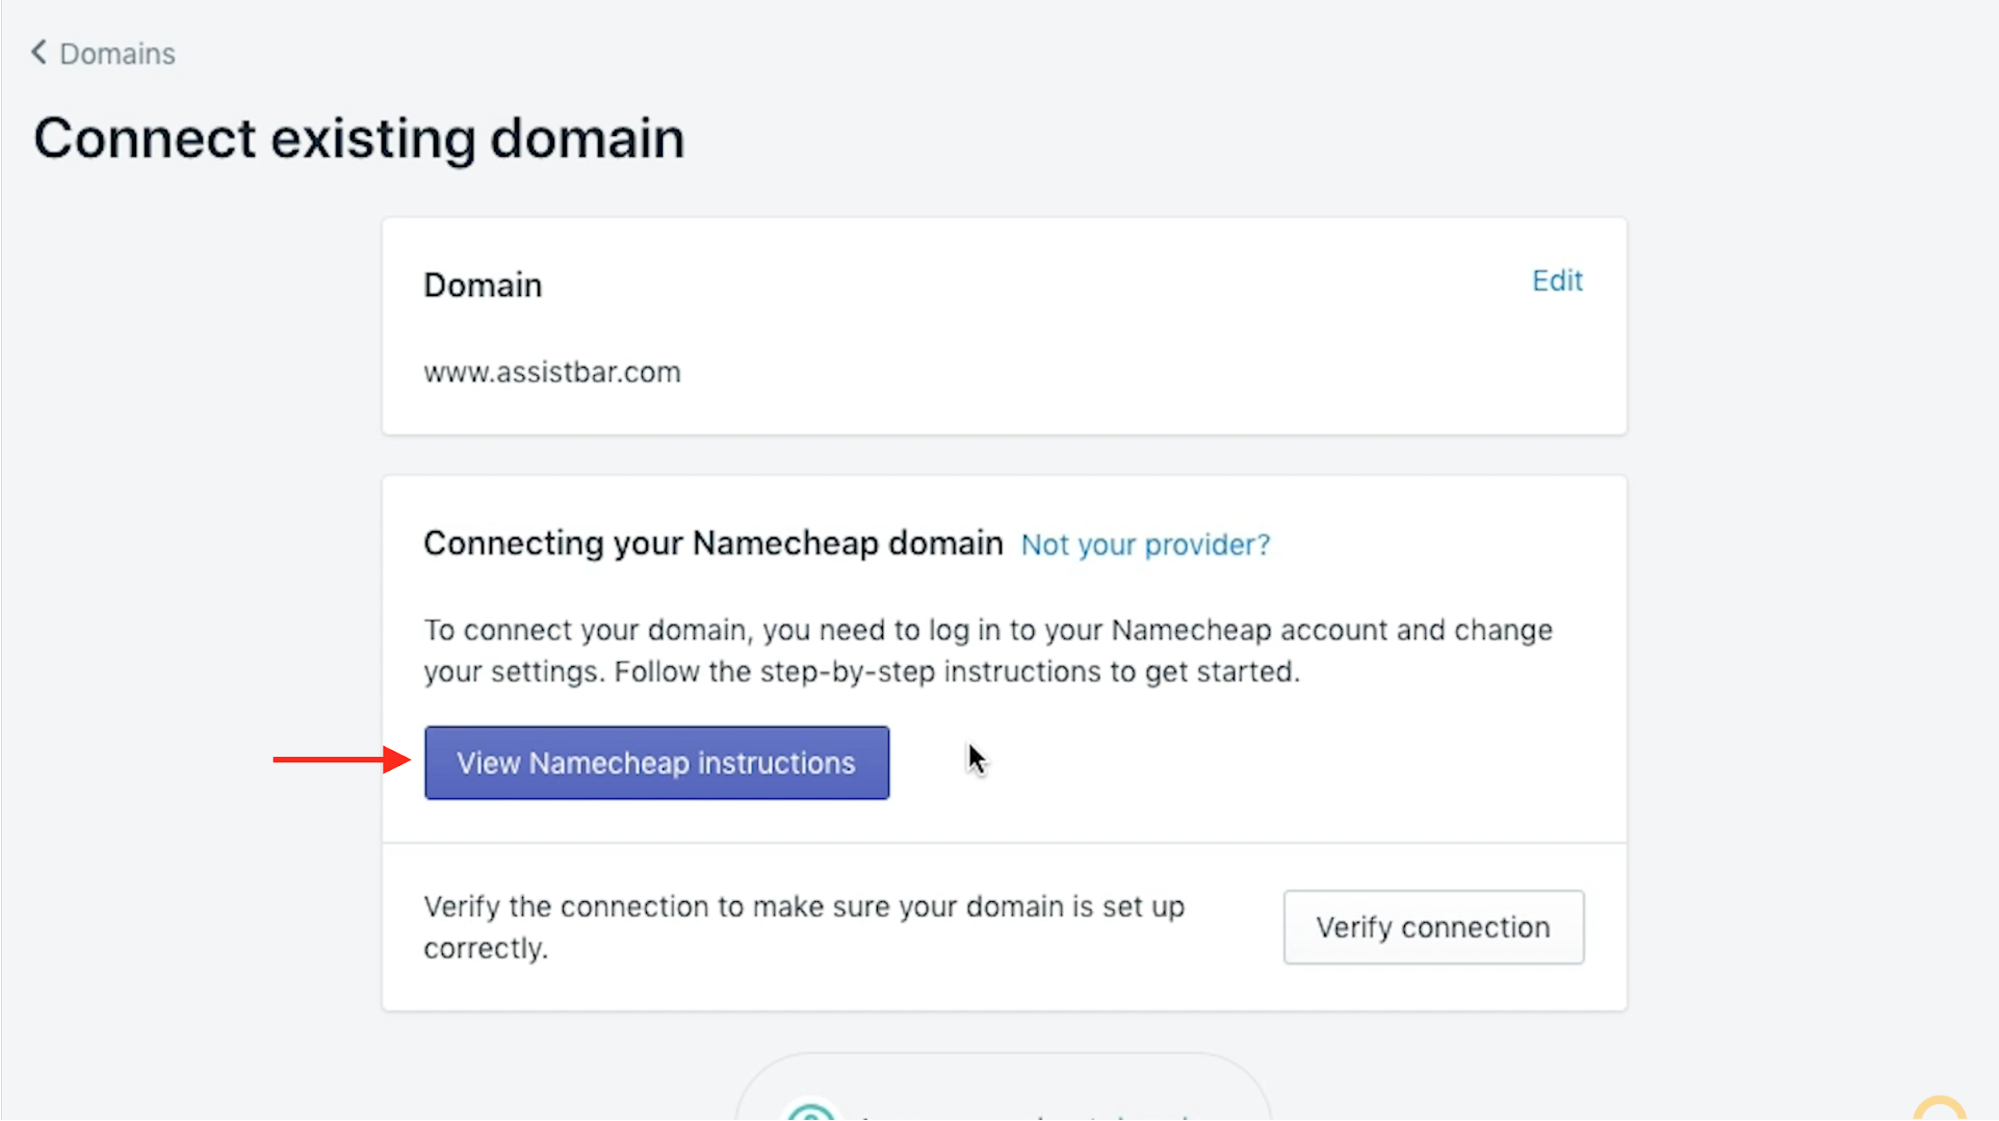
Now we’re going to tell Shopify the domain name we’ve purchased. On the left side navigation, select Online Store > Domains > Connect existing domain.

Input the new domain name and click Next.

Shopify detects which registrar is being used and provides you with a link of simple to follow instructions to complete the configuration.

There are two records that will need to be added to the registrar. The first is the A record, which points to Shopify’s IP address: 23.227.38.32.


Next, we’ll set up the WWW. Because we also want www.assistbar.com to take us to the same website, we need to configure the CNAME Record.

The reason we do this is to give DNS management control to Shopify. Since they manage a huge network infrastructure, they can push updates and our website will not be affected. Again, we’ll set the TTL to 5 minutes.
Now that we have the A Record pointing to assistbar.com, and the CNAME pointing to www.assistbar.com, it’s time to return to Shopify to verify the connection.
Note: Reduce your TTL to 5 minutes to see faster results.


There are a couple of things that I want to point out when you add a new domain name to your site.
You're going to get a notification that says "SSL pending." There is a small waiting period (typically 24 hours) while Shopify verifies your domain name. After the waiting period, that notification will display "SSL approved" and that means you're completely secured with HTTPS.